10 Best Slide And Negative Converters 2025 in the United States
Related Products
Up to 15% off


Our technology thoroughly searches through the online shopping world, reviewing hundreds of sites. We then process and analyze this information, updating in real-time to bring you the latest top-rated products. This way, you always get the best and most current options available.
Our Top Picks
Winner
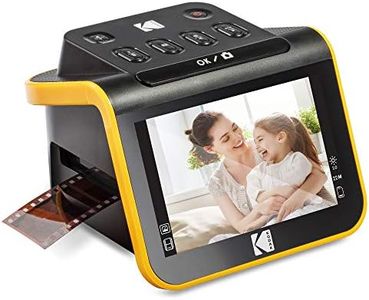
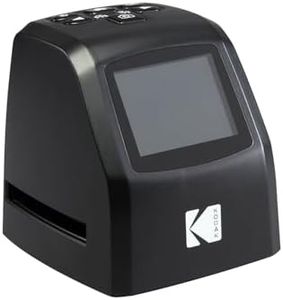
KODAK SLIDE N SCAN Film and Slide Scanner with Large 5” LCD Screen, Convert Color & B&W Negatives & Slides 35mm, 126, 110 Film Negatives & Slides to High Resolution 22MP JPEG Digital Photos
Most important from
10723 reviews
The Kodak Digital Film Scanner is a solid choice for anyone looking to convert old film and slides into digital format. With a high resolution of 22MP, it captures detailed images that can breathe new life into your cherished memories. The 5” LCD screen makes it easy to preview and edit your photos on the spot, ensuring you can quickly see the results and share them with friends and family. Its user-friendly design and straightforward interface allow you to load film quickly and start scanning without much fuss.
One of the standout features is its compatibility with multiple film types, including 135, 110, and 126 films, making it versatile for various users. The ability to save directly to an SD card is convenient, but keep in mind that the card isn't included, which could take a bit more planning.
However, while the scanner's ease of use is a major plus, some users might find that the scanning speed can be a bit slow if they have a large number of slides or negatives to process. Also, the quality of the scanned images may vary depending on the condition of the originals. Another point to consider is that while the scanner connects easily to Type-C USB-enabled computers, it may not have all the advanced editing features that professional photographers might desire.
Most important from
10723 reviews
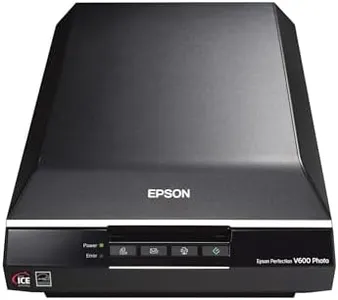
Epson Perfection V600 Color Photo, Image, Film, Negative & Document Scanner
Most important from
7006 reviews
The Epson Perfection V600 is a versatile scanner designed for users looking to digitize slides, negatives, and photos with high quality. One of its standout features is its impressive resolution of 6400 x 9600 dpi, which allows for large enlargements up to 17 x 22 inches, making it an excellent choice for photographers and hobbyists wanting to preserve their film and photo memories in detail. The built-in transparency unit is particularly beneficial for scanning slides and medium format negatives, and the Digital ICE technology effectively removes dust and scratches, enhancing the quality of scanned images.
Ease of use is another strong point, thanks to customizable buttons that allow for quick scanning tasks like copying or creating PDFs with just one touch. The automatic scanning features further simplify the process for users who may not be tech-savvy. The inclusion of software like ABBYY FineReader Sprint for OCR and ArcSoft PhotoStudio for photo editing can also be valuable for those looking to restore or enhance their images.
On the downside, the V600’s weight of 9 pounds might make it less portable compared to lighter models, which is something to consider if you plan on moving it frequently. Additionally, while the scan speed is decent, users looking for ultra-fast scanning may find it a bit slower when processing high-resolution images. Lastly, although the scanner is compatible with various operating systems, it’s always a good idea to check for specific compatibility with newer software updates.
Most important from
7006 reviews
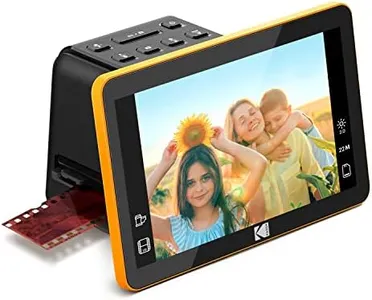
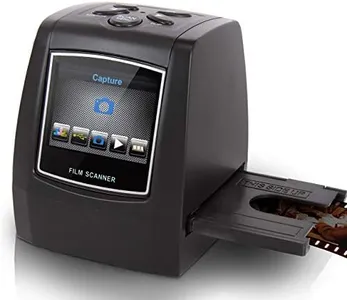
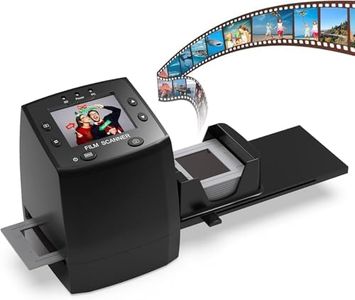
KODAK 7" Digital Film Scanner - Converts 35mm, 126, 110 Negatives & Slides to 22MP JPEGs
Most important from
1163 reviews
The KODAK 7" Digital Film Scanner stands out in the category of slide-and-negative converters, particularly for those wanting to digitize their old photo memories with ease. One of its main strengths is the impressive resolution, allowing you to convert negatives and slides into high-quality 22MP JPEGs. The addition of a 7-inch LCD display makes it user-friendly, providing a clear view for previewing and editing images right away, which can be a fun way to share memories with friends and family.
This scanner is versatile, accommodating various film types including 35mm, 126, and 110 negatives, which means it can cater to a wide range of users with different types of old film. The easy-load film inserts make scanning quick and convenient, suitable for those who may not have a lot of experience with similar technology. Plus, the advanced capture software simplifies the editing process, allowing users to enhance images with just a touch of a button.
There are some drawbacks to consider. The scanner relies on SD cards for storage, which are not included, and the maximum capacity of 32GB might not be sufficient for larger projects. Additionally, while it has USB connectivity, the absence of an HDMI cable might limit usage for those who want to connect it directly to a television for display. In terms of speed, it is generally efficient, but scanning multiple images can take time, particularly for those with extensive collections. The KODAK 7" Digital Film Scanner is quite suitable for casual users looking to preserve their photo history with high-quality digital outputs, albeit with some limitations in storage and connectivity options.
Most important from
1163 reviews
Buying Guide for the Best Slide And Negative Converters
When choosing a slide and negative converter, it's important to consider several key specifications to ensure you get the best product for your needs. These devices are designed to digitize your old slides and negatives, preserving your memories in a digital format. Understanding the key features will help you make an informed decision and select a converter that meets your requirements.FAQ
Most Popular Categories Right Now


